Welcome to the assignments planner basics. The assignments tool in CEO is meant to provide the 'Organization' aspect to CEO (Collaborate, Edit, and Organize). These are powerful new features to our content management system that will allow you to communicate more internally and mitigate the use of third-party communications or organizing everything in your email inbox.
With the assignments planner, you'll be able to create assignments with due dates, create content from the assignment, and assign and communicate within CEO. Your assignments can be organized into 'issues', providing even more organization to your calendar.
To start, let's define a few terms:
- Assignment- Assignments are similar to internal notes in CEO, but with additional functionality. You can assign them to users, set a due date, schedule a meeting, attach content, or use it to message another user.
- Issue- An issue is a grouping of assignments organized by date. This will allow you to organize your assignments on the calendar tool.
Navigating to the planner tool
To begin working with the assignments planner, navigate to the planner page by opening the sidebar menu in CEO and selecting
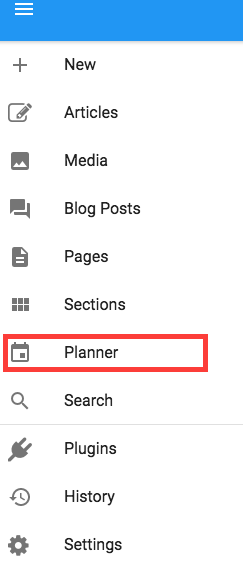
Assignments Planner
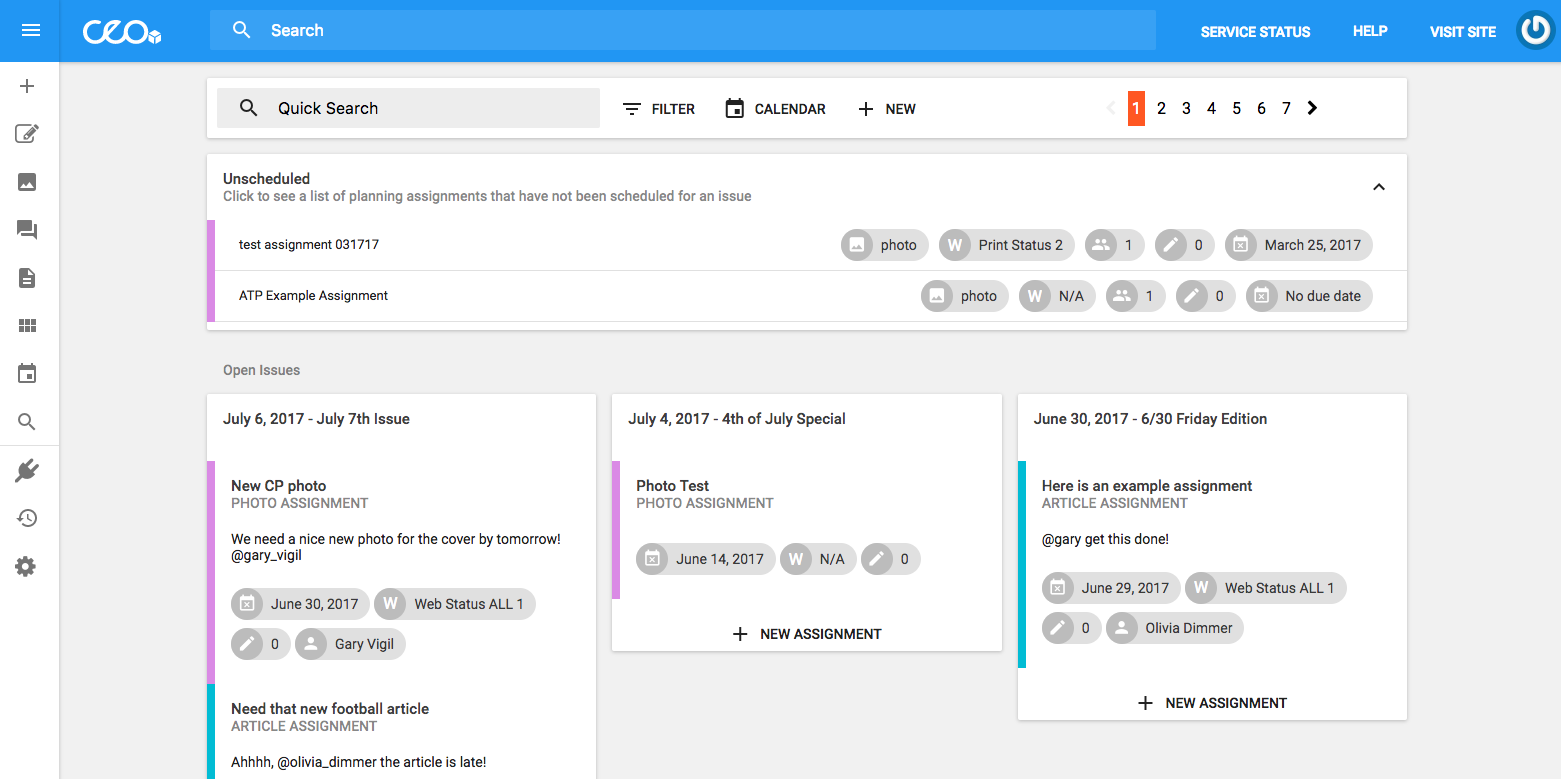
When you are on the assignments planner page, you can see all of the unscheduled assignments and assignments that have been scheduled for an issue. This is a good page to view upcoming assignments assigned to the most recent issues.
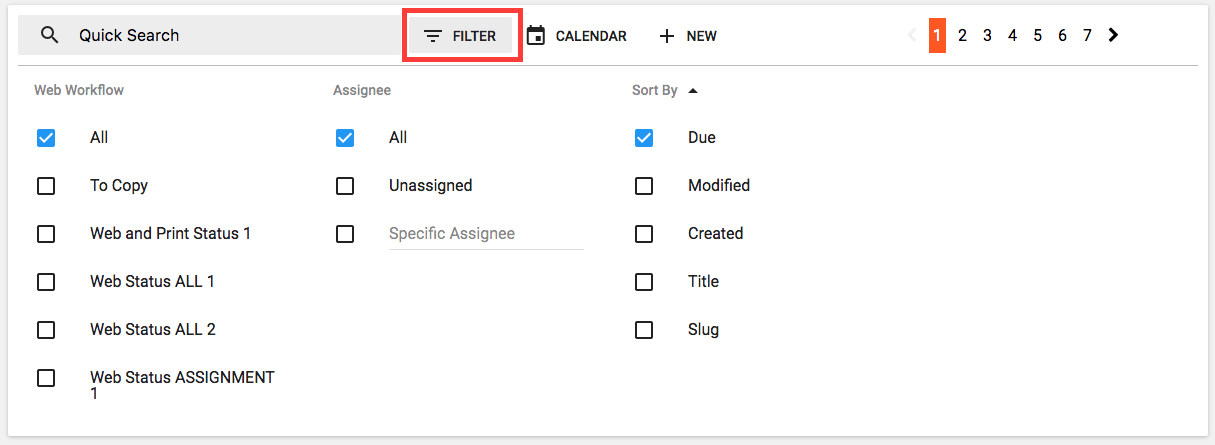
Assignments can also be filtered if you would like to narrow down the assignments you are viewing by selecting the filter button and applying a filtering category.
Calendar View
Another method to view your issues and assignments is with the calendar view. You can view this page by selecting the 'Calendar' at the top of the page. All issues and assignments added to those issues are viewable here on the calendar, any unscheduled assignments will only display in this view when you sort by 'Due Date'.
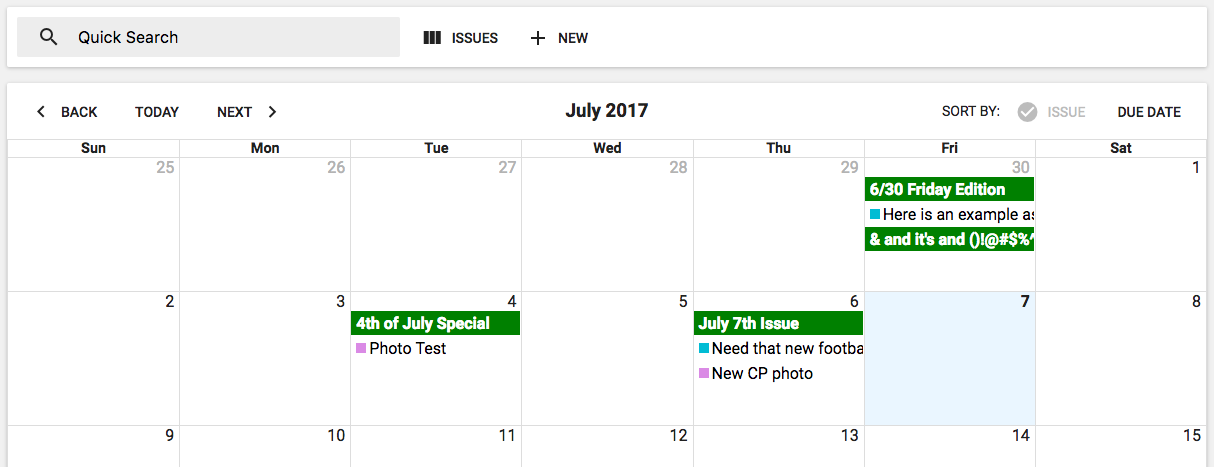
The calendar has two different views; by issue and by the due date. In the issue view, you can create a new issue by clicking a day on the calendar. In the due date view, you can create a new assignment by clicking a day on the calendar. The due date view also lets you drag and drop assignments to change their due date.
Creating a New Issue
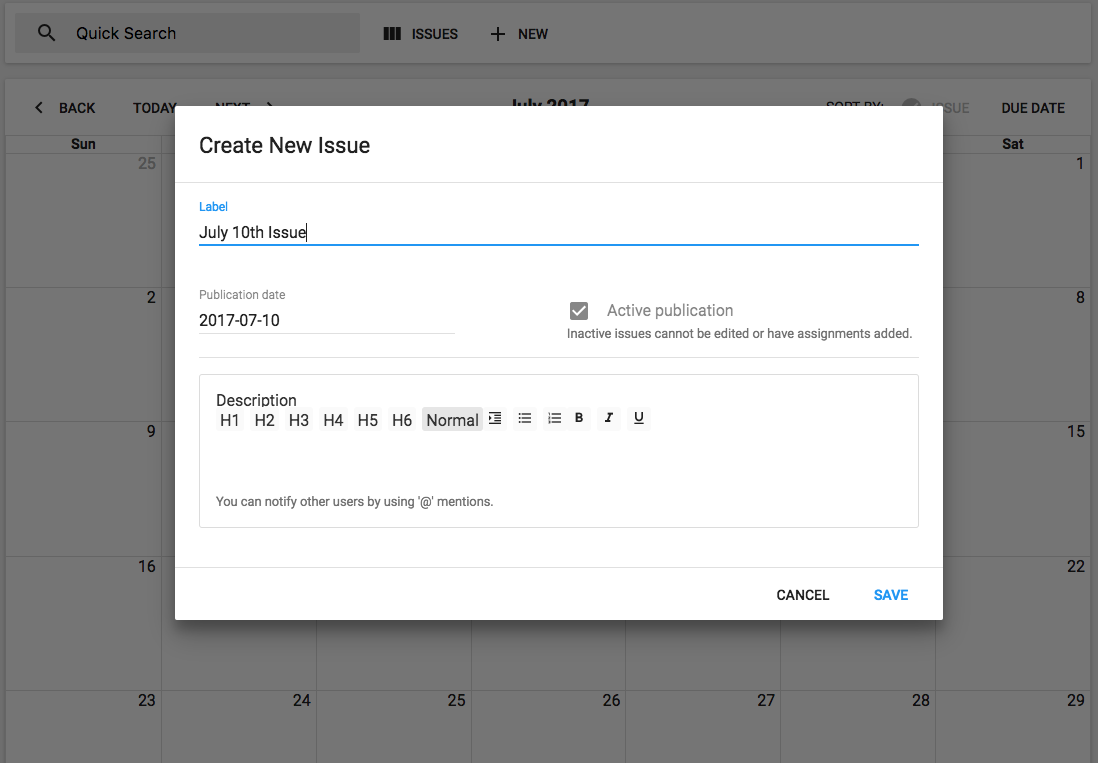
There are multiple places in CEO that you can create a new issue. You can use the 'create new issue' button on the homepage, select a date on the calendar page, or navigate to 'Issues' on the settings page.
In the 'issue' view on the calendar, you can see all issues in that month and their assignments. If you select a date, the 'Create New Issue' box will display and you can add a new issue directly to the calendar.
Creating a new Assignment
To add a new assignment select "+ NEW" on either the homepage, planner, or calendar pages. This will navigate you to the new assignment page.
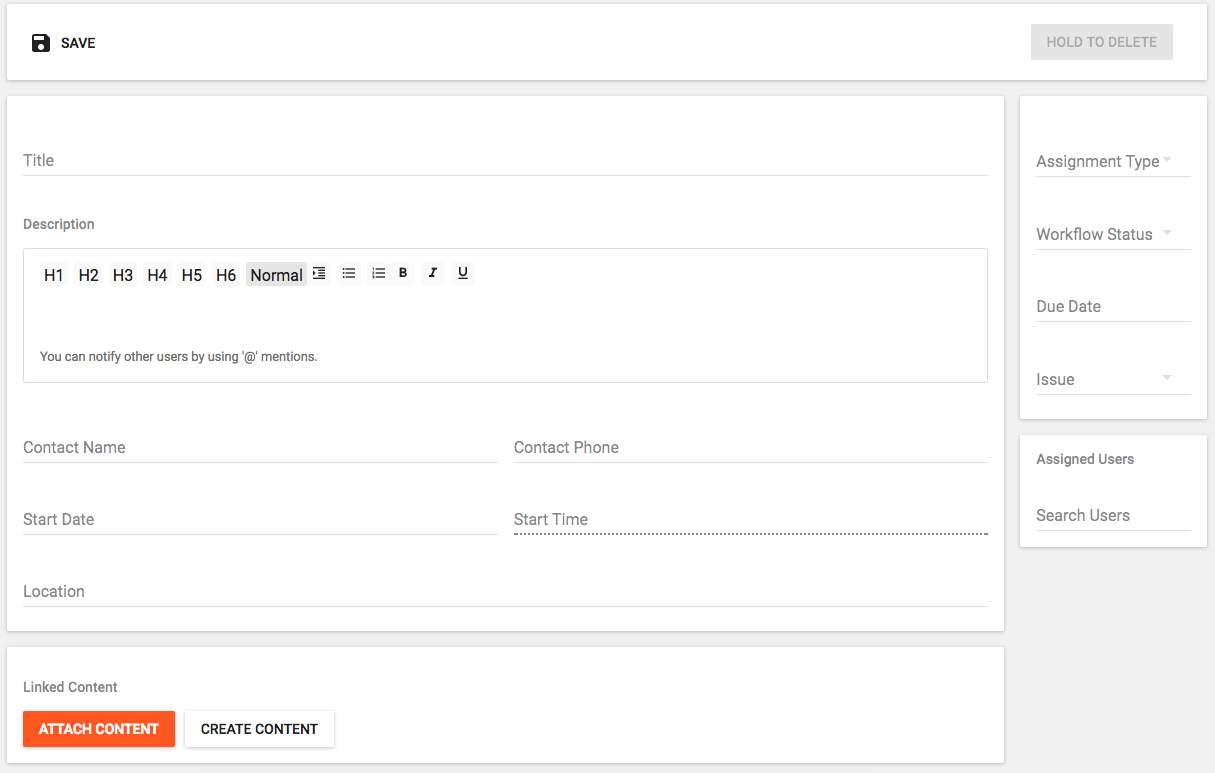
Assignments are required to have a title, but you can also add detailed descriptions (with the ability to notify other users by using '@' mentions), contact information, scheduling, and location information.
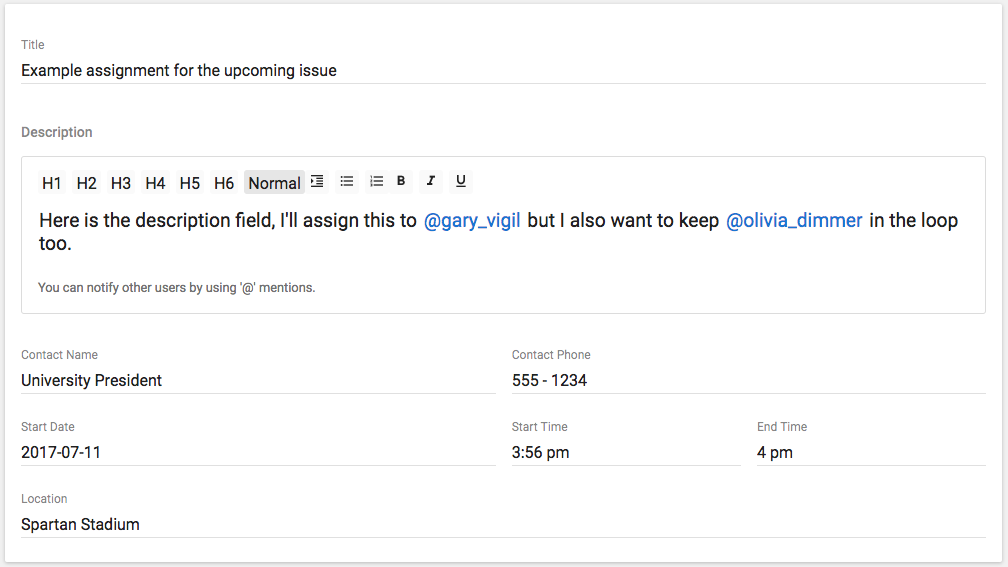
After the basic information has been added, feel free to select the 'Save' button at the top. This is what adds the assignment to the database, and from here you can check in and check out the assignments like other content in CEO.
Now that the assignment information has been added, we can adjust the assignment type, workflow status, assign a due date, and apply this assignment to an issue on the right sidebar drop menus. Below that, you can assign this to a user by entering their name in the 'Search Users' field.
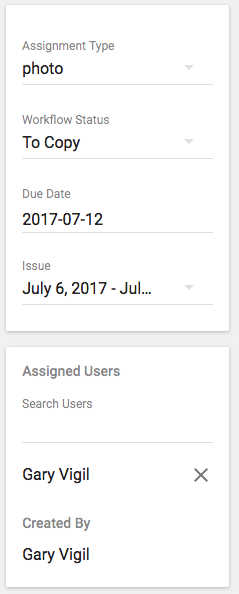
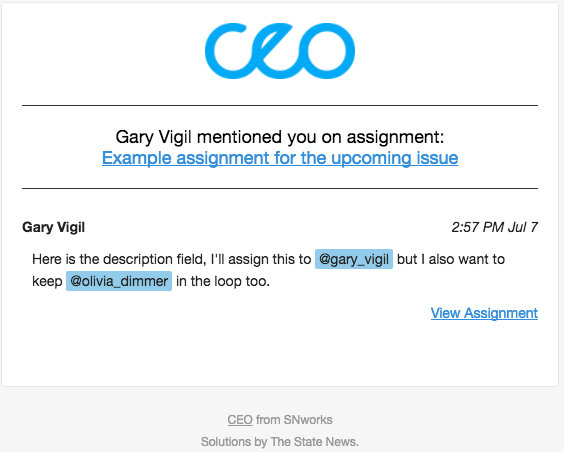
When mentioned or assigned an issue, the user will receive an email alert.
Using Assignments for Communication
Now we have added a new assignment and assigned it to a user, the last thing to look at is the discussion field. This functions very similarly to the description field but is meant for adding notes and communicating with other users about the assignment. You can notify other users by using '@' mentions.

After you are done commenting and you're directing your message with an '@' mention, save and check-in and your message will be emailed. There are no limits on comments, and all comments are logged with the date and time so you know exactly when the message was submitted.
Creating Content from an Assignment
When an assignment has been created and assigned, the assignee can create and attach content directly on the assignment. This functions the same way as creating a new article with the navigation button but has the added advantage of connecting the assignment and the new content.
Right above the discussion box is the linked content. By selecting the 'create content' button, that will direct you to a new article. After you enter the basic article information and save and check-in, the article will appear within the linked content.


Comments
0 comments
Please sign in to leave a comment.